First steps after signing up
Start by preparing a checklist, inspectors and any required facility, then create a schedule. You can create a checklist before registering a facility.
1. Check organization and account settings
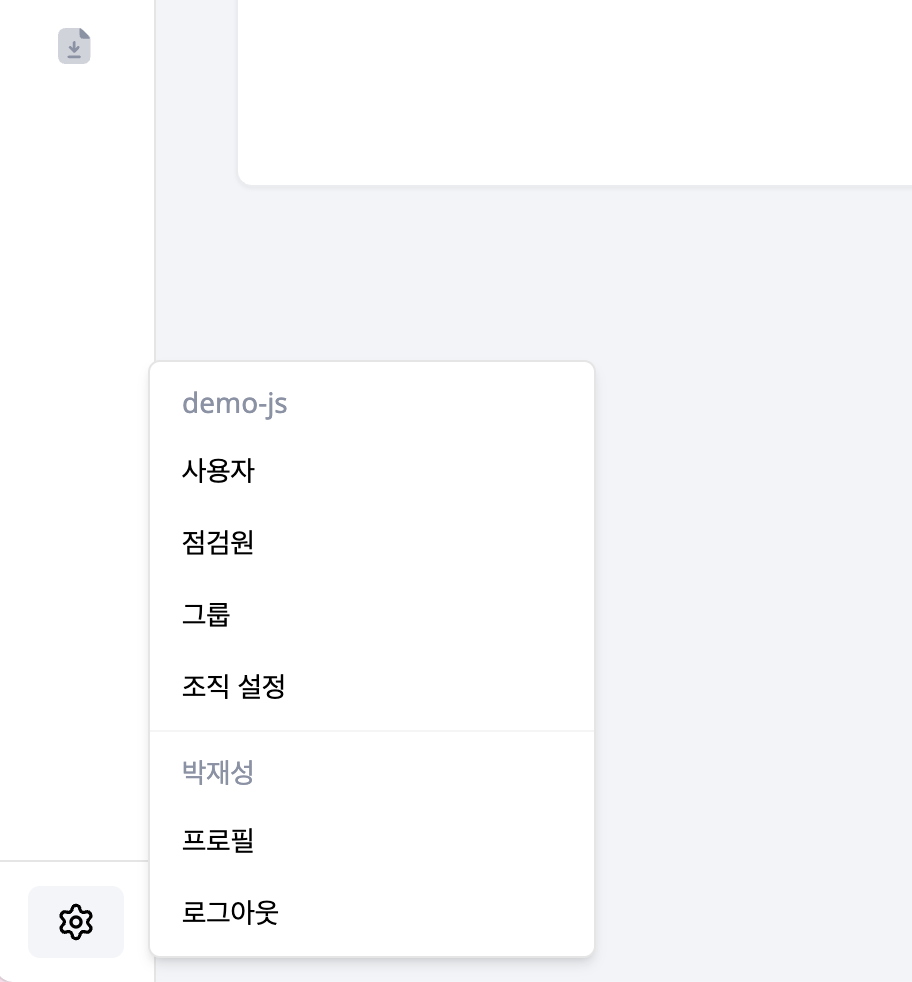
Select the gear icon at the very bottom of the left sidebar to open the account menu. Administrators review the organization name, language and time zone in organization settings. Each user can check personal information in their profile.
2. Prepare your team
- Invite members who will manage operations in Admin.
- Register inspectors who will perform work in the field app.
- Create groups and assign people when you need teams.
- Configure the app's organization login in Shared account.
3. Prepare the target and checklist
Register a facility when inspecting a specific place or piece of equipment. Tasks assigned to people can operate without a facility.
Create a checklist with questions, answer types, photo requirements and guidance. If you have an existing document, you can create a draft with AI.
4. Create a schedule
In Schedules, choose the type, target, checklist, workers, dates and recurrence.
| Type | Prerequisites |
|---|---|
| Inspection | Facility, checklist and assigned inspectors |
| Task | Checklist and assigned inspectors; no facility selection |
Check recurrence dates in the calendar preview and review completion conditions before saving.
5. Review your first results
After an inspector completes work in the field app:
- Check completion in Inspection status.
- Review answers and photos in Inspection records.
- Review and follow up on reported issues.
- Request a report to share operations with others.
See Troubleshooting if a menu is missing or a list is empty.