
Inventory
Register supplies and materials used at a facility, then record movements to track quantities and identify items that need replenishment.
Before you start
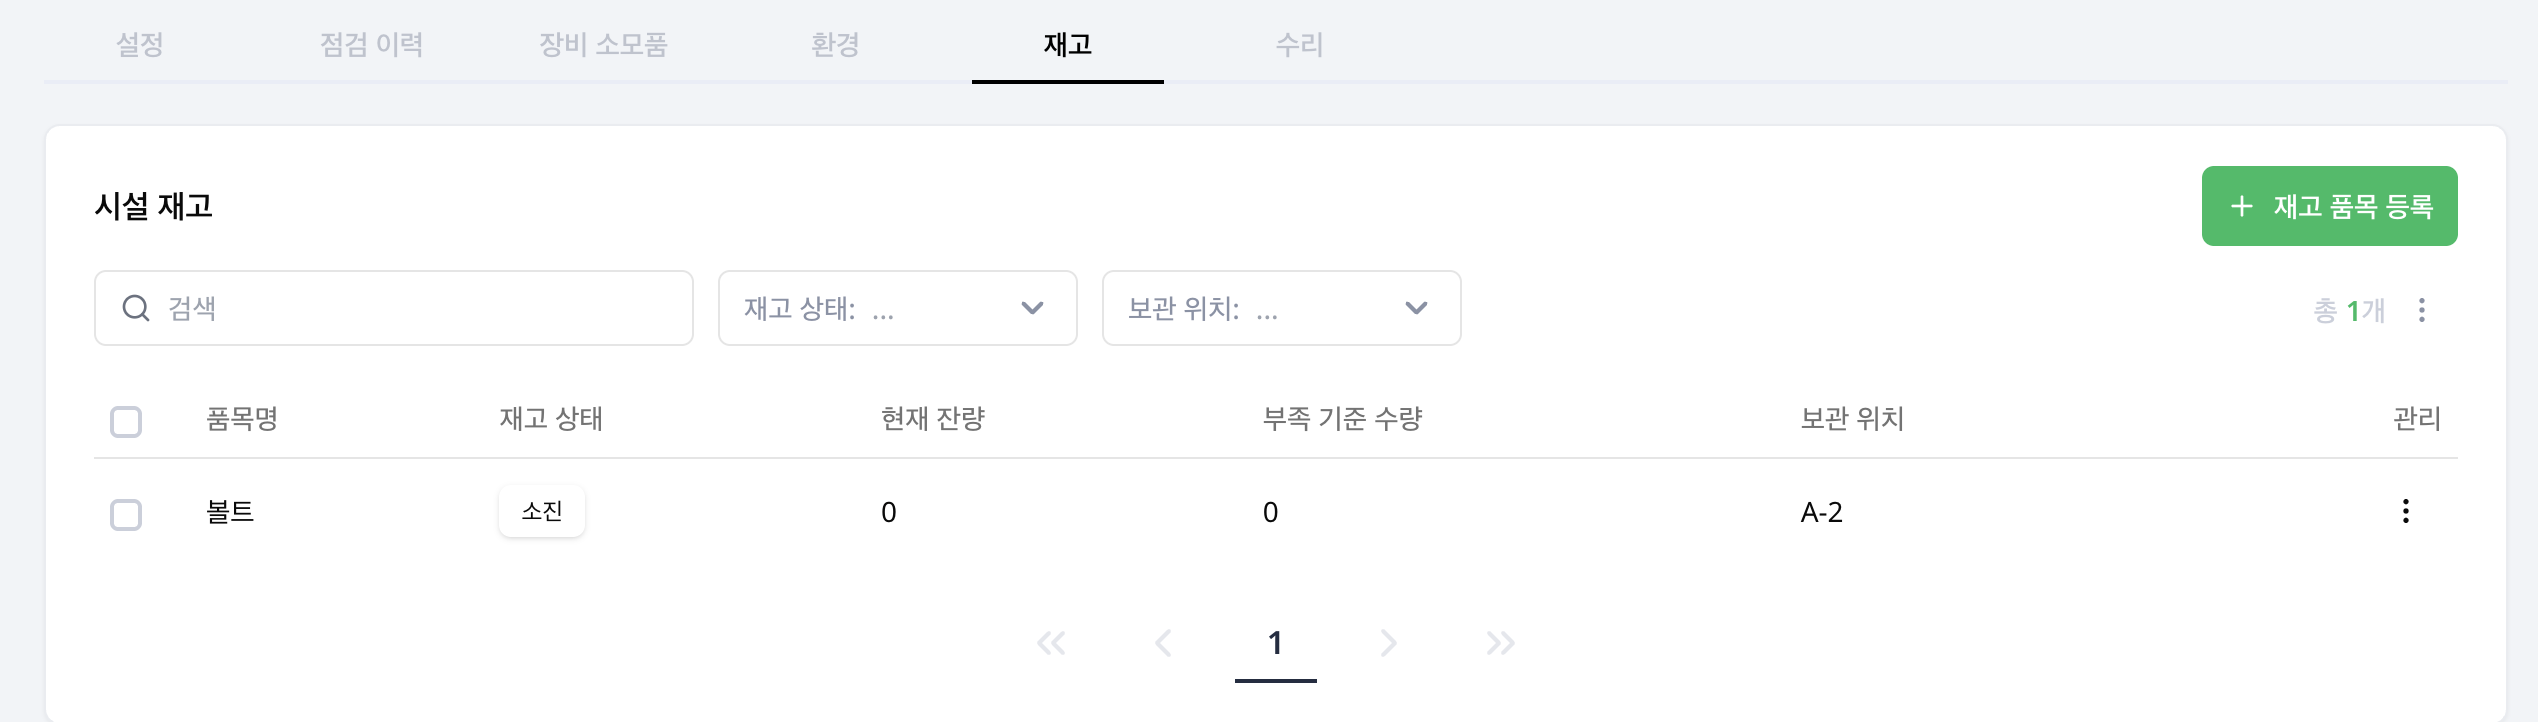
Enable Inventory in facility settings and open the facility's Inventory tab. Management actions such as creating items and changing quantities are available to administrators.
Register an item
- Select Register Inventory Item and choose Manual Entry.
- Enter the Name and SKU (required), and add the unit, Initial Stock, Low-stock Threshold and Location if needed.
- Save and check Current Stock and Status in the list.
Use the low-stock threshold to help identify replenishment needs. Choose units and thresholds that match how your team stores and uses each item.
Register multiple items with Excel
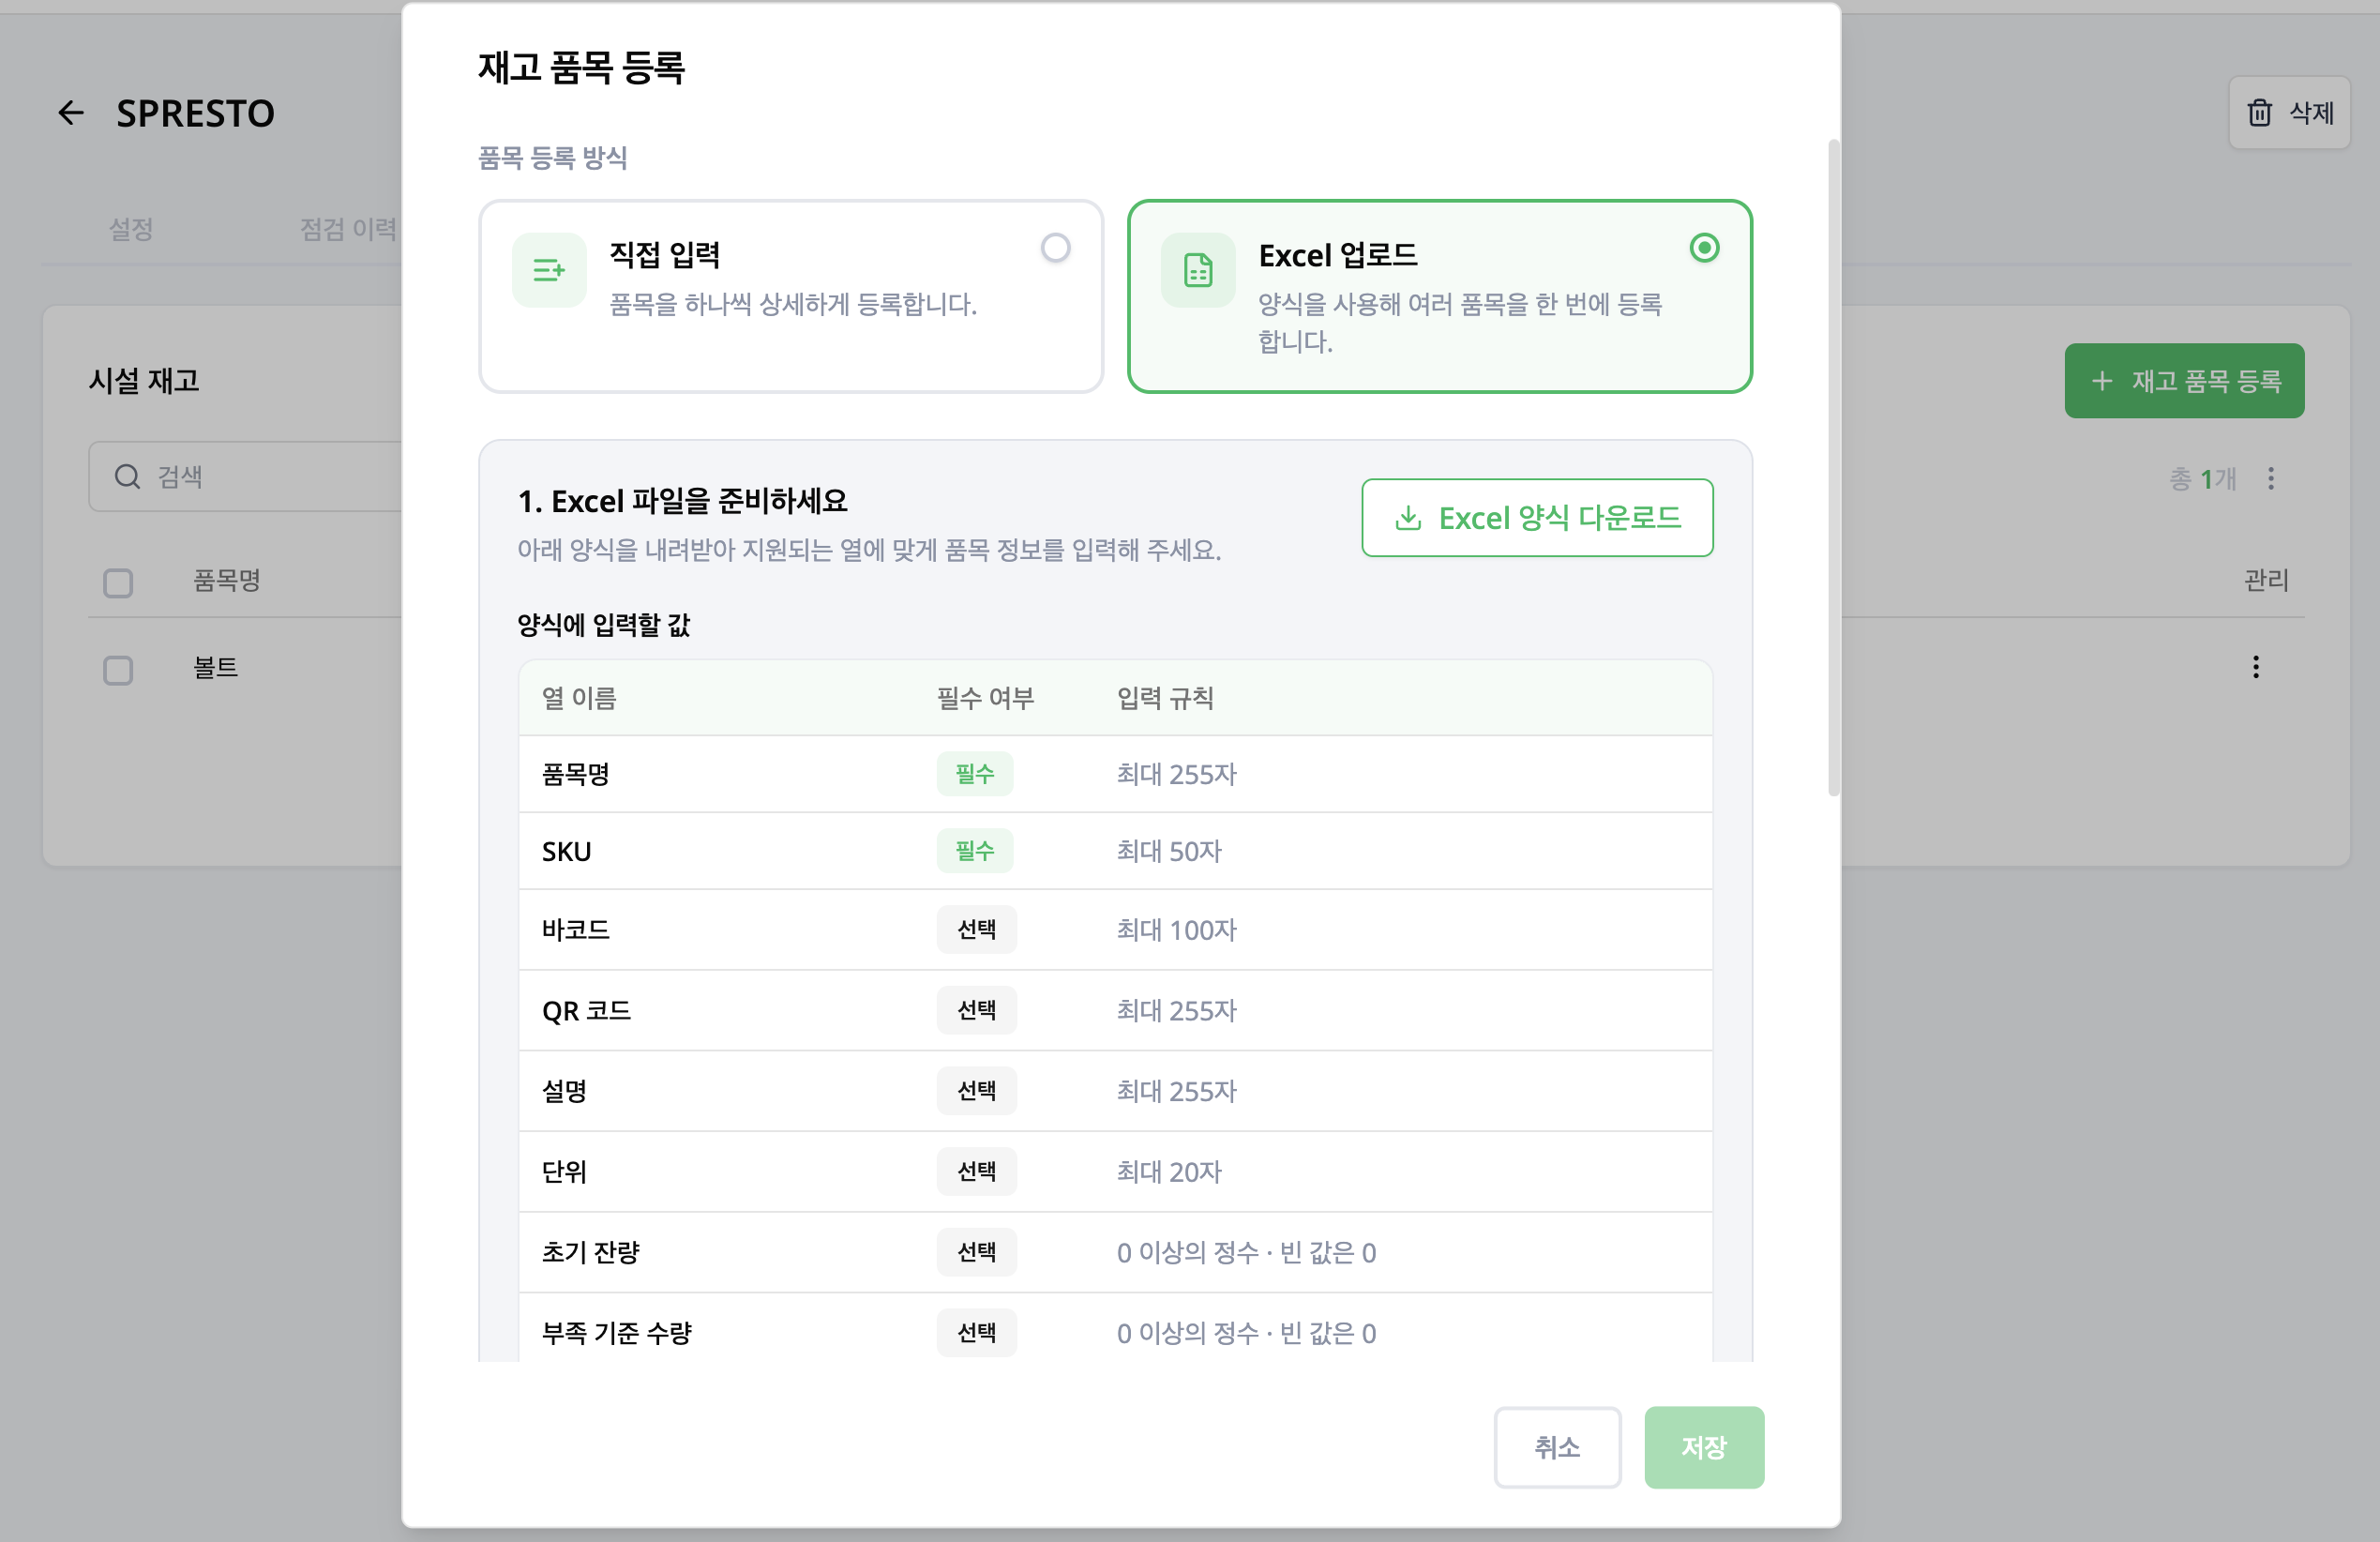
In the Register Inventory Item dialog, choose Upload Excel. Select Download Excel template, fill it in following each column's requirement and rules shown on screen, then attach the XLSX file and save. Upload one non-empty file, up to 5MB.
After import, check current stock, units and locations in the item list.
Change stock
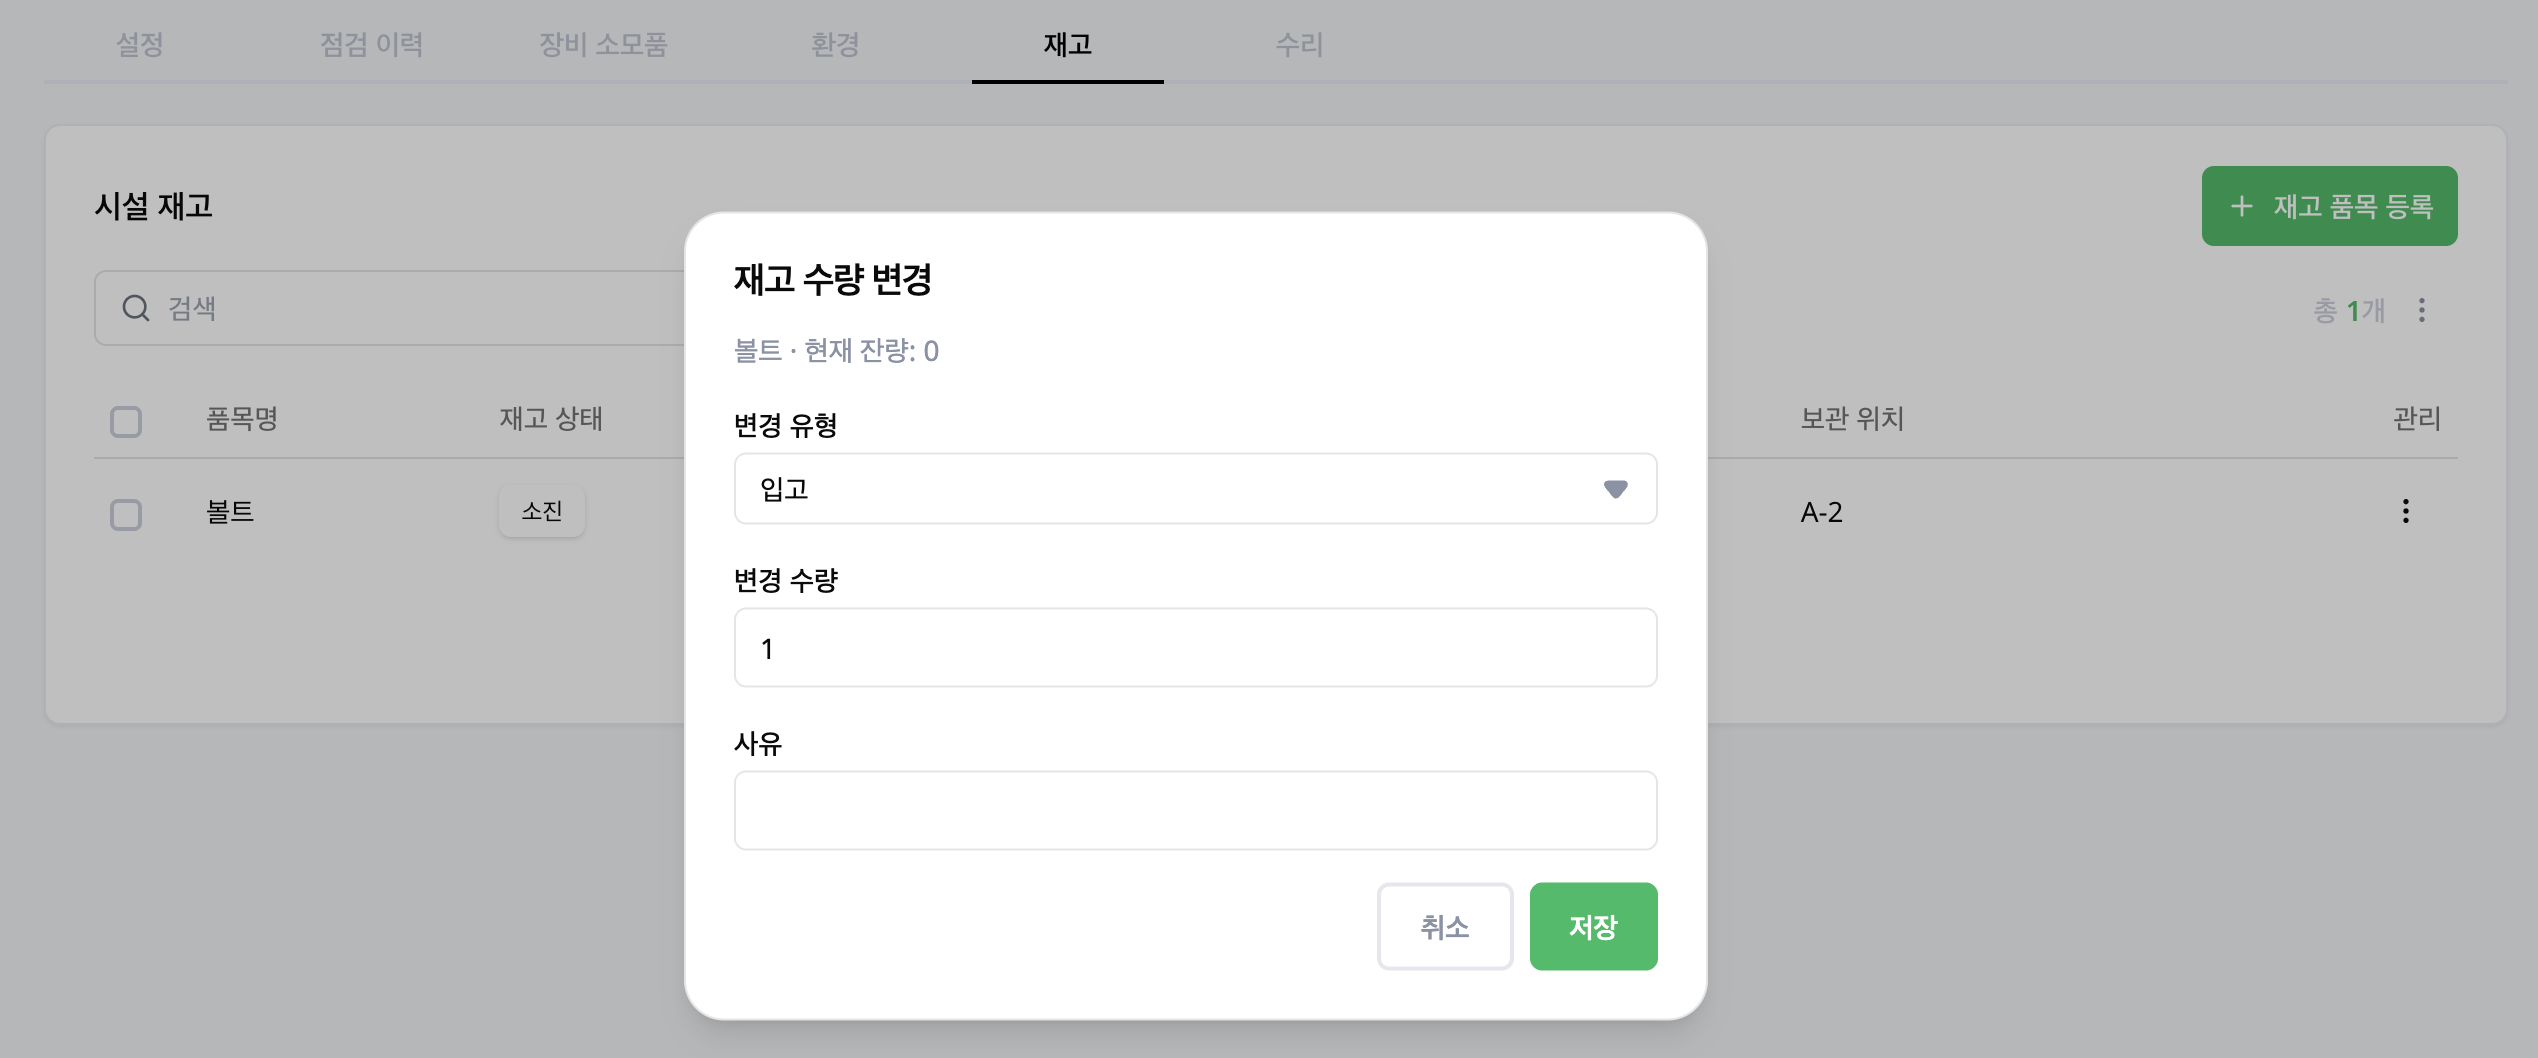
Select Change Stock from an item's actions menu (⋮) to open Change Inventory Stock. Enter the Movement Type, Quantity and Reason, then save.
| Type | Quantity to enter |
|---|---|
| Inbound | Quantity received |
| Outbound | Quantity used or removed |
| Stocktake Adjustment | Final stock after a count (absolute stock after adjustment) |
If you have 10 items and use 3, enter an outbound quantity of 3. To reconcile the total to 8 after a stock count, choose Stocktake Adjustment and enter 8. Outbound quantity cannot exceed current stock.
Review history
Open Movement History from an item's actions menu to review quantity changes. If stock does not match, review the history and record the counted total as a stocktake adjustment. Use search with the Status and Location filters to narrow the list.