
Bulk member management
Create or update multiple accounts from a file. As an administrator, open Account menu > Users, then select More (⋮) next to Add users and choose Add or update users in bulk.
1. Prepare a file
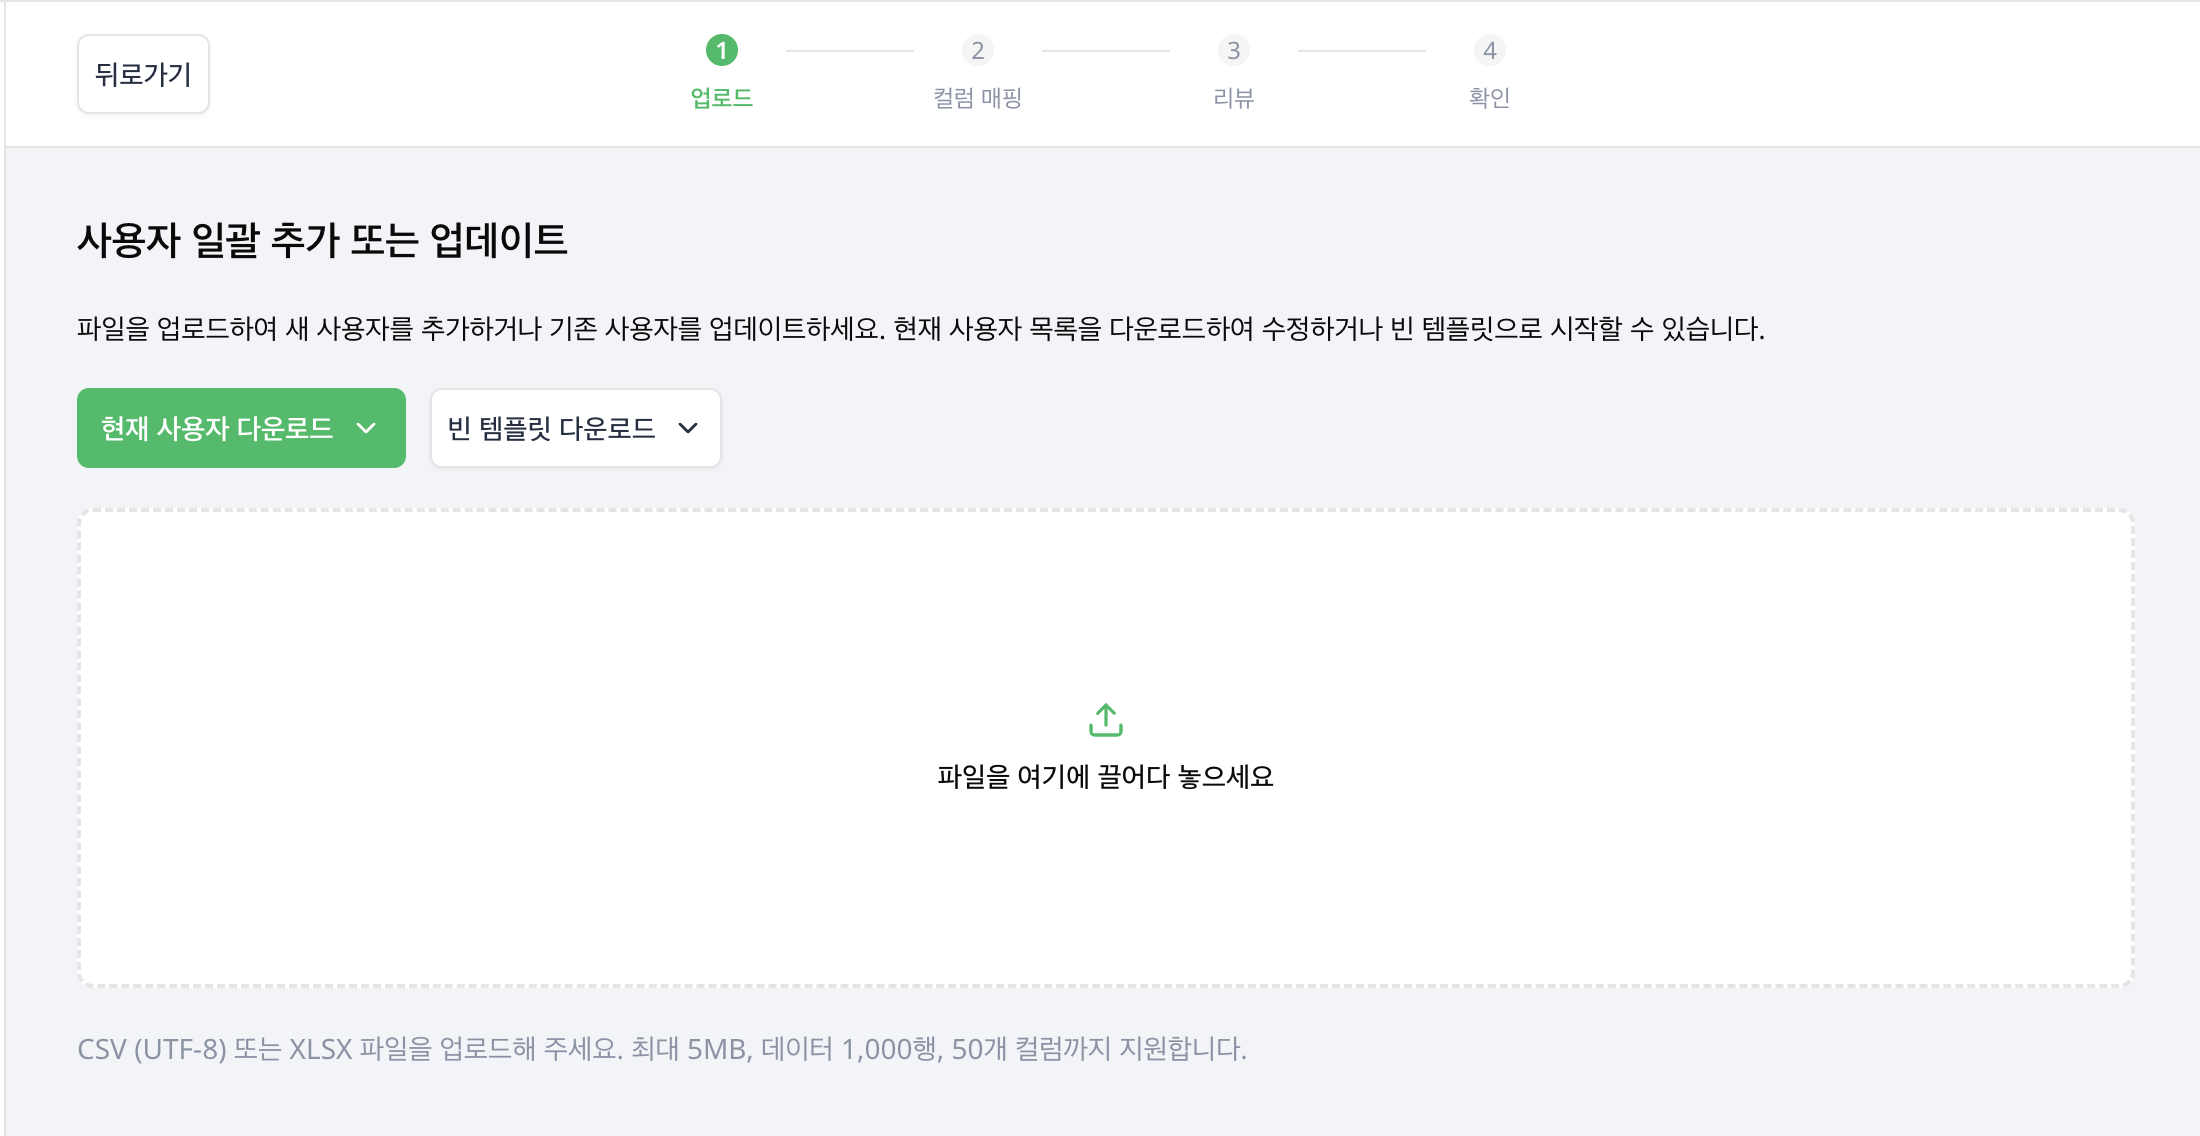
Select Download empty template for new accounts, or Download current users to edit existing information. CSV (UTF-8) and XLSX are supported.
Bulk management runs in four steps—Upload → Column Mapping → Review → Confirm—and the current step is shown at the top of the page.
Upload one file at a time, up to 5MB. Empty files are not accepted.
2. Map columns
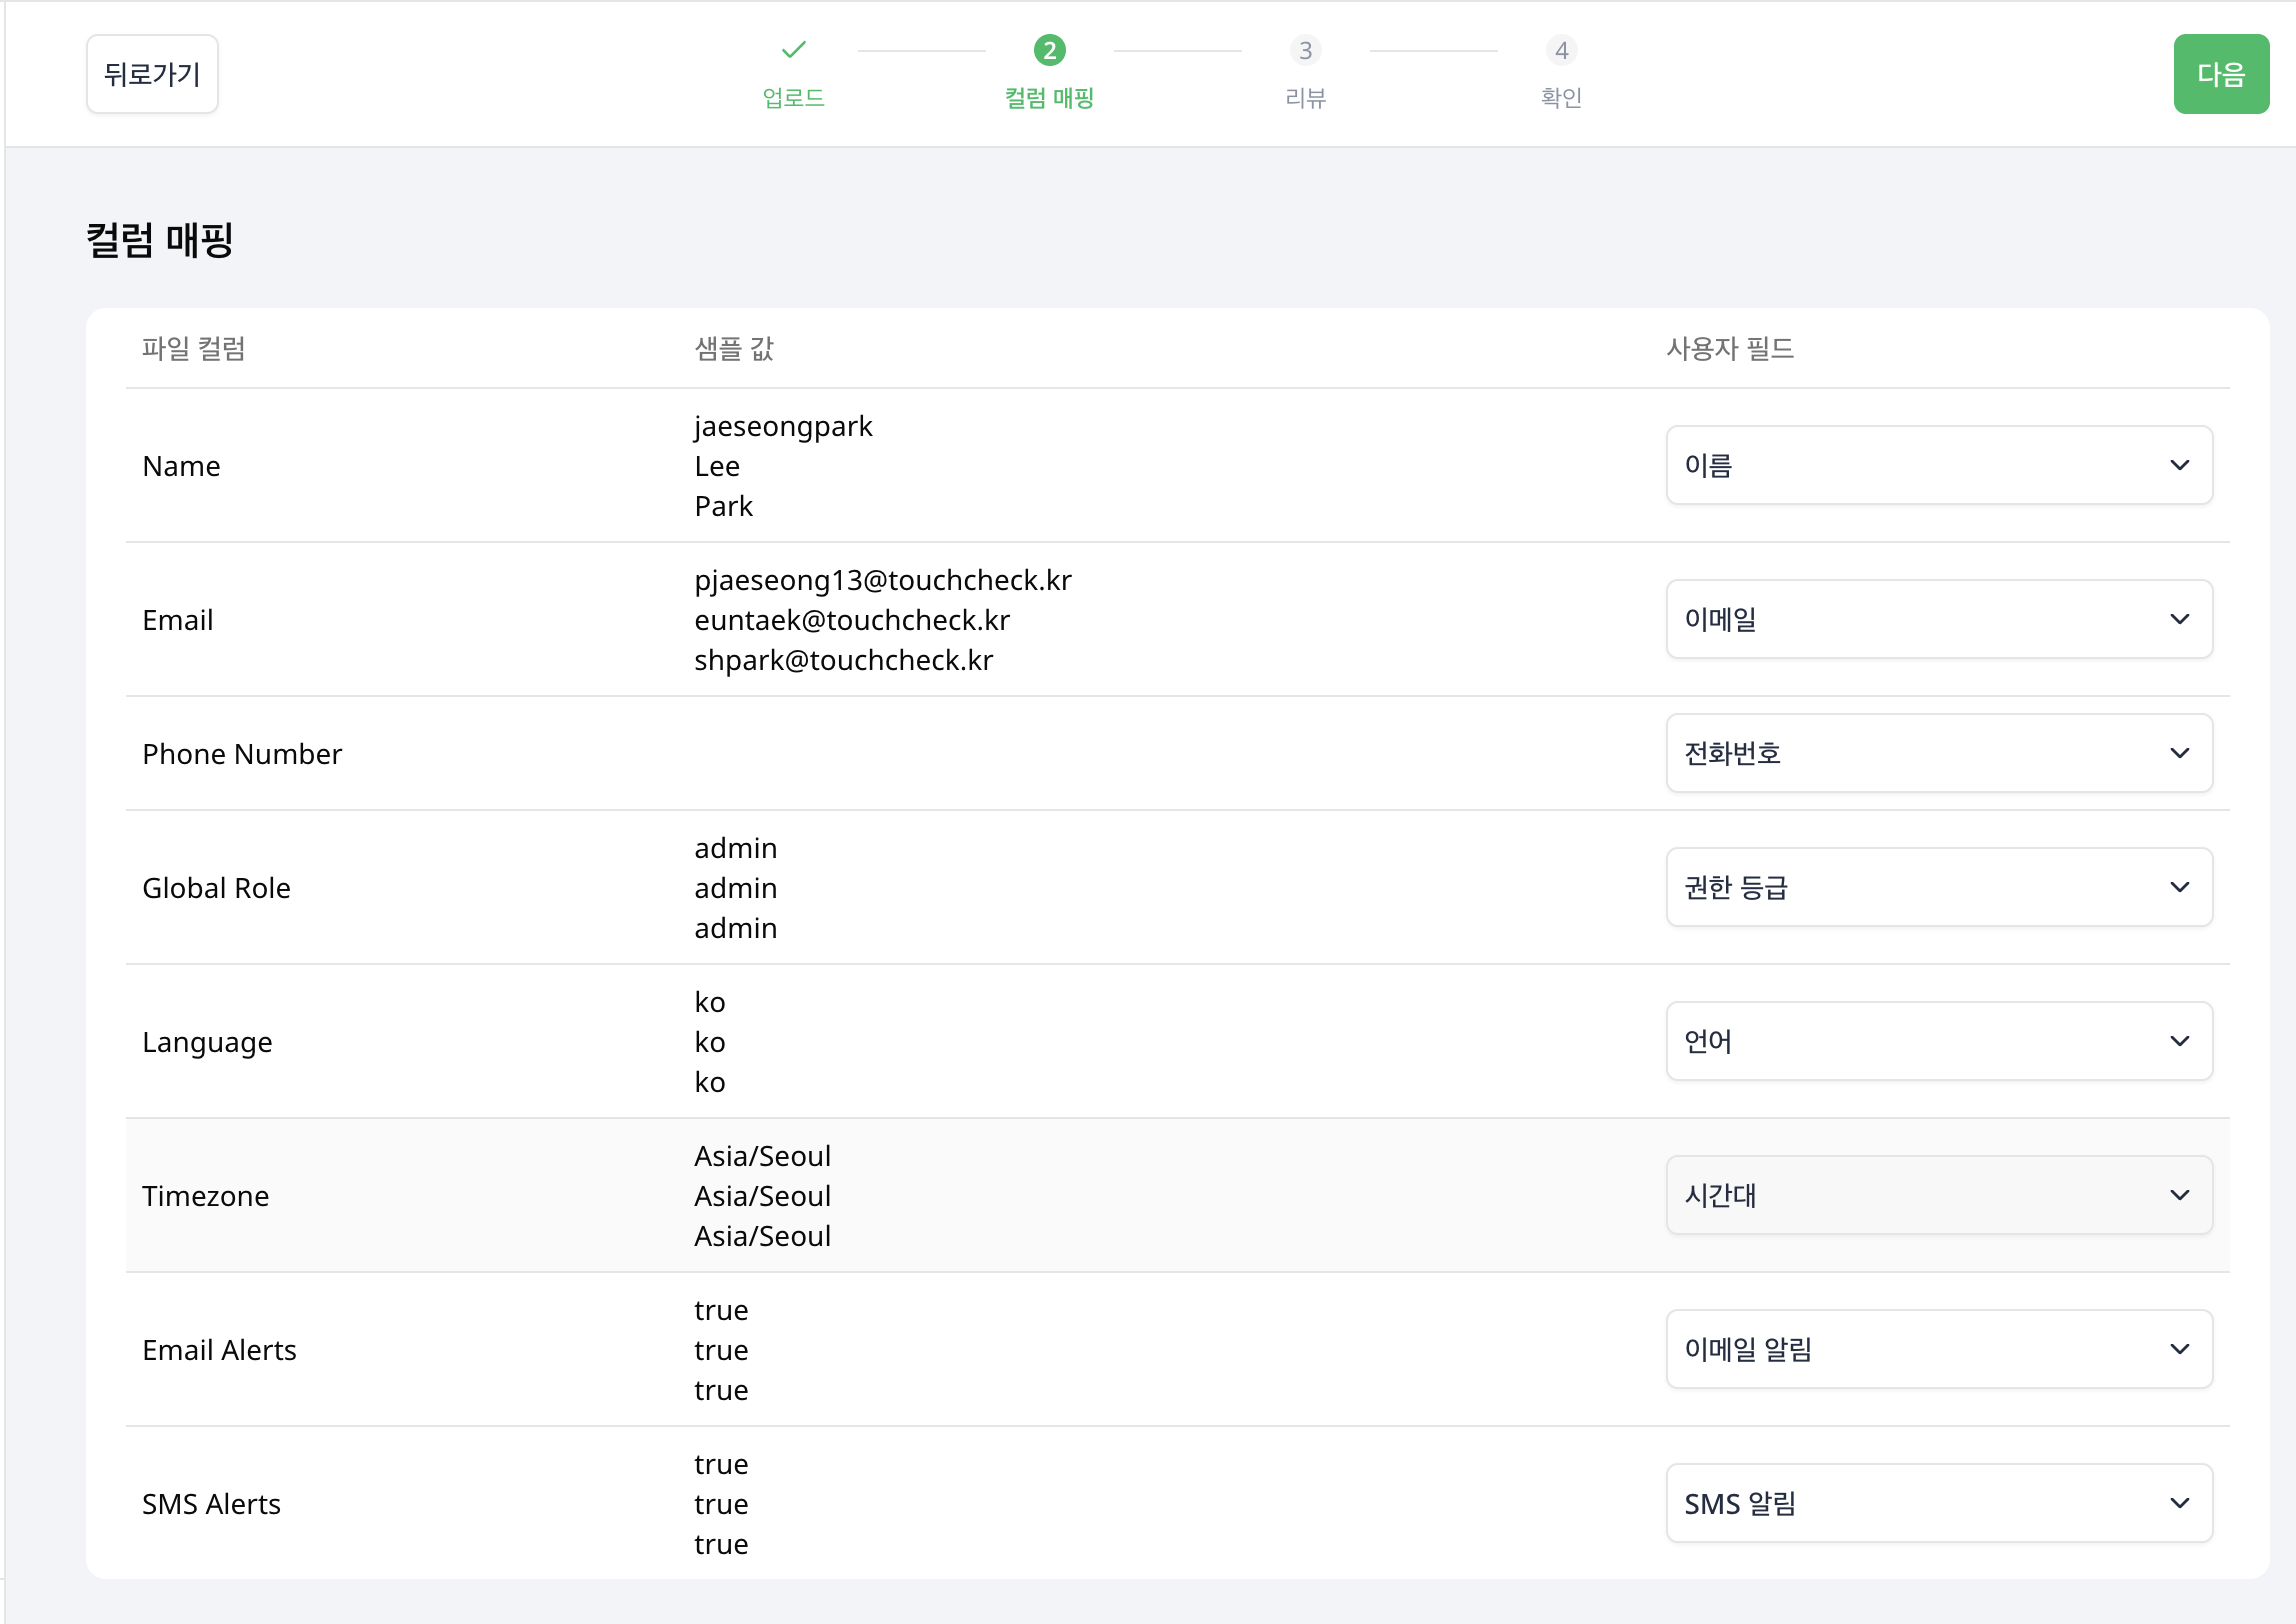
After you upload a file, the Column Mapping step opens. Check each file column and its sample values, choose the matching User field, and select Next. Check important mappings such as names and email addresses carefully.
3. Review and correct errors
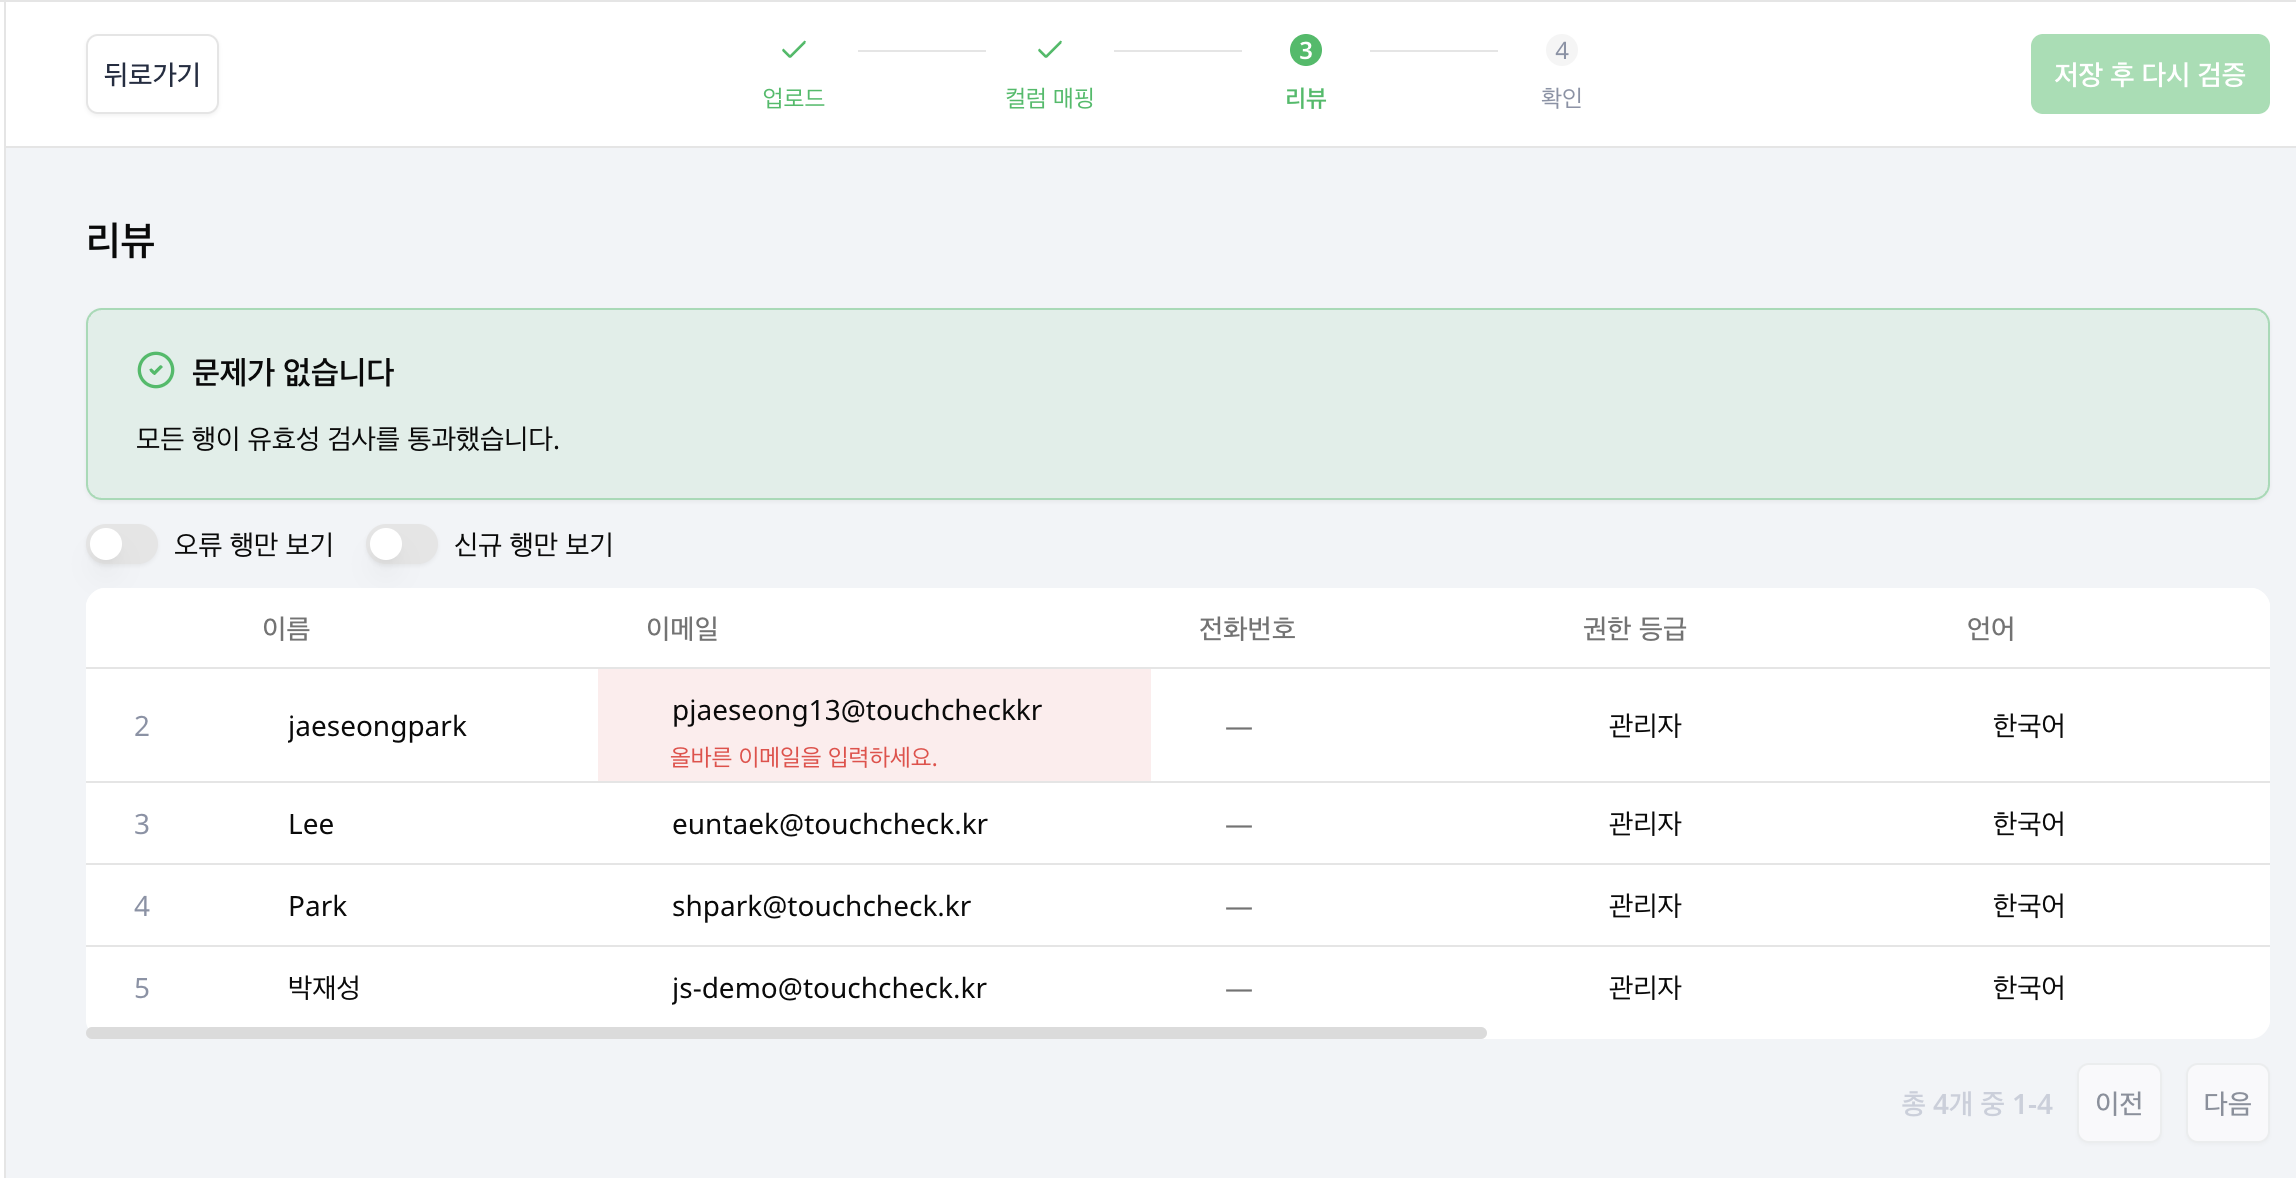
In the Review step, check affected rows and errors. Fix invalid cells directly in the table, select Save and revalidate, then continue. Use Show only rows with errors and Show only new rows to narrow the table. Uploading alone does not apply account changes.
4. Confirm and apply
In the Confirm step, check the counts of new and updated accounts, then submit. Verify the result in the member list.
If a conflict occurs because information changed during review, check the latest list and repeat the review.